

In an earlier post I covered my favorite way to access the Nano via SSH over the USB mini port. And I covered what Mac users need to do to remotely display the Wireshark GUI. But not everyone is a Mac user (I CAN’T EVEN) so what is a Windows user to do? I got you fam.
Step 1: Get an X11 Server
There are a few options, and I can’t speak to all of them. There is Xming and it’s been around the longest as far as I know. It has free and pay versions, but the free version hasn’t really been updated in a while. Cygwin/X is part of the Cygwin package, and that may be a viable option, but with WSL these days I don’t really use Cygwin anymore. (Side note, you’ll note that WSL is *not* part of the solution I’m presenting. I thought it would be easily done that way, but turns out…not. WSL is not really Linux, and that became an issue. I’m not saying it can’t be done, but it was more work than I wanted to do. But for SSH/SCP/etc without X11 it works great.)
I ended up choosing VcXsrv. And to be honest, it “just worked”. Download that and install. Be sure to start it before proceeding.
Step 2: Install PuTTY
Ok, this may seem redundant – I’m pretty sure 99% of network engineers with Windows laptops have PuTTY installed, but in the off chance that you’t don’t have it installed…go do that.
Step 3: Configure networking
At this time, you want to use a USB-micro to USB-A cable and plug that in to the USB-mini port on the Nano and to your laptop. You *should* end up seeing a new network interface. It should look something like:
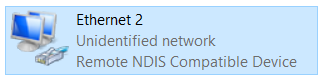
You may also see some messages about preparing “Linux for Tegra” for use. It may also not be Ethernet 2 depending on your system, but the Remote NDIS part is what to look for. In theory you should have IP connectivity, but in at least once case I was seeing some…oddness…with the DHCP server on the Nano, so I highly recommend you configure a static address on this interface. Anything in 192.168.55.0/24 will work, just don’t use .1. (That’s what the Nano uses.) I’m not going to go over how to statically configure a Windows network interface here, though.
Step 4: Configure display forwarding in PuTTY
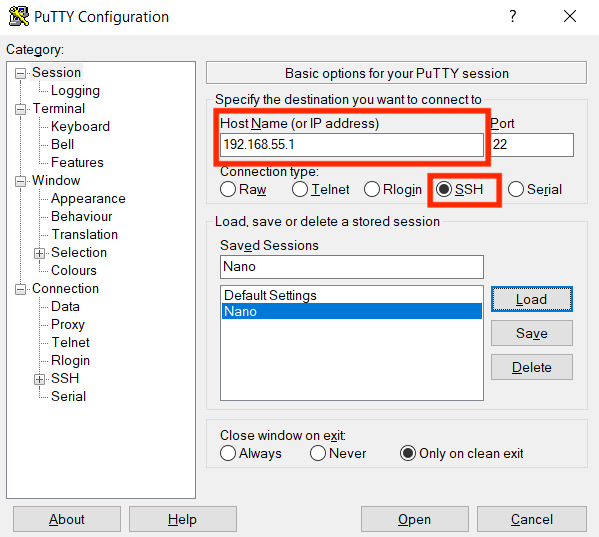
Configure a PuTTY session for the Nano. You’ll be SSHing to 192.168.55.1:
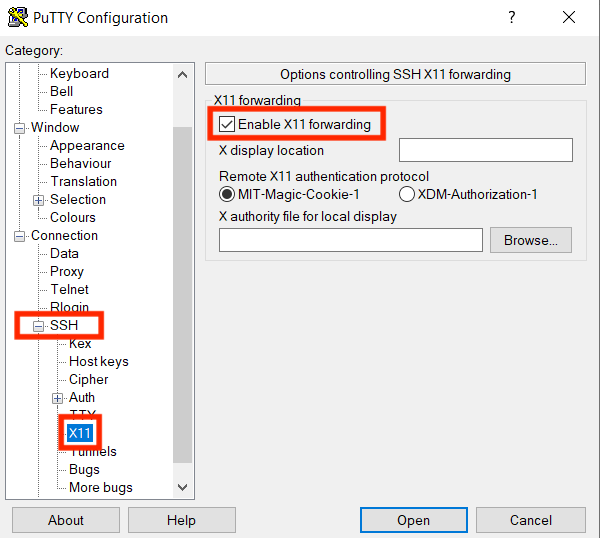
and enable X11 forwarding. Scroll down on the left and it’s under Connection, SSH, X11.
Now SSH to the Nano and log in.
Step 5: Run Wireshark
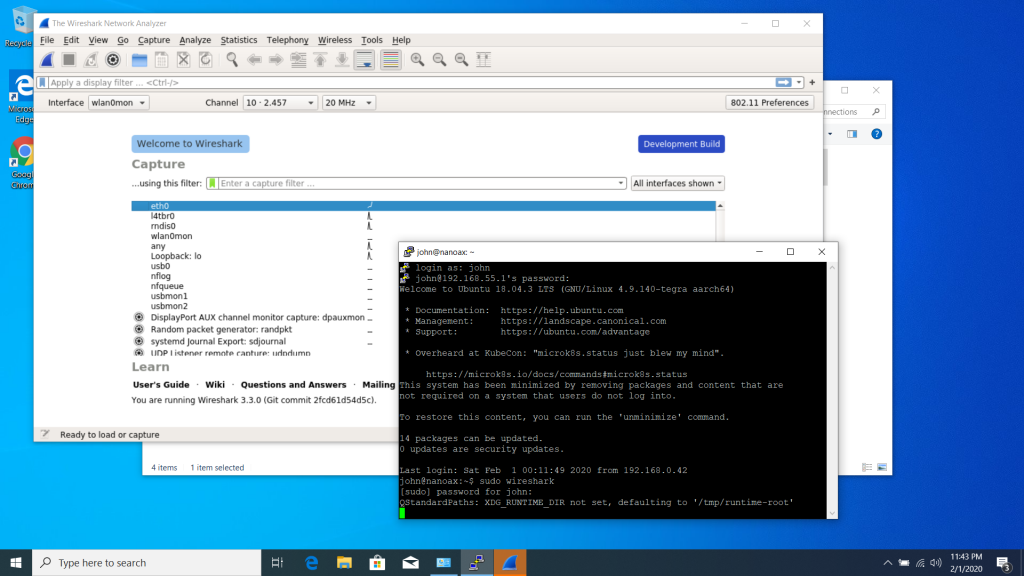
At this point proceed to Step 3 of my previous post (Nano packet captures using the Wireshark GUI) and it’s all the same. Install wireshark and when you run it you should get something like:
Enjoy!